Create a timeline
A timeline brings together the milestones you want to reuse across events. For a concert, for example, you can plan for doors to open one hour before the show starts.
You need permission to manage timelines in your organisation.
Create the timeline
- Open Settings → Run sheet → Timelines.
- Select New timeline.
- Name it “Evening concert”, then press Enter.
Your timeline is created. You can now add its milestones.
Add the start of the show
- Select Add a milestone.
- In Milestone name, enter “Show starts”, then press Enter.
- Select Save.
The first milestone becomes H0, the reference point used to position the other milestones. When this timeline is used for an event, H0 will match the event’s Reference time.
Add doors opening
- Select Add a milestone again.
- Name it “Doors open”, then press Enter.
- Check that Reference milestone is set to “Show starts”.
- Enter 60 in Gap in minutes, confirm with Enter, then choose before.
- Select Save.
Your timeline now has two milestones:
| Milestone | Position |
|---|---|
| Doors open | One hour before H0 |
| Show starts | H0 |
If the event’s reference time is 20:00, doors will be scheduled to open at 19:00. You do not need to choose an event date to prepare this timeline.
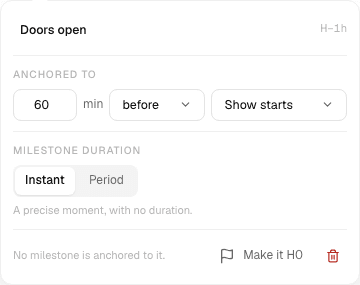
The doors opening time is calculated from the start of the show.
Use this timeline
Add it to an event template to include these milestones in events created from that template.
If Add a milestone is unavailable while you are editing, select Save or Discard before continuing.